


We have all seen doors, off center, that have been wrongly installed.
Over time those doors can begin to stick out and they are an unnecessary eyesore.
Properly installing a door may seem daunting, but it's not that difficult if you have the right tools and know what you're doing.
In this blog post, we'll walk you through the steps of properly installing a door by yourself.
We'll also provide tips that the pros use for making the process go more smoothly, helping you avoid some strains and headaches.
So if you're installing a new door or considering doing one soon, read on for this easy step-by-step process!
Step 1. Gather The Essentials
Installing a door by yourself or even with a little help can be confusing, especially when you don't know which tools to use. So step 1 is, of course, make sure you have the necessary tools!
Here are some things you will definitely need to finish installing your door:
Pry bar
Putty knife
Door
Drill
Screwdriver
Frame
Shims
Nails
Screws
Hammer
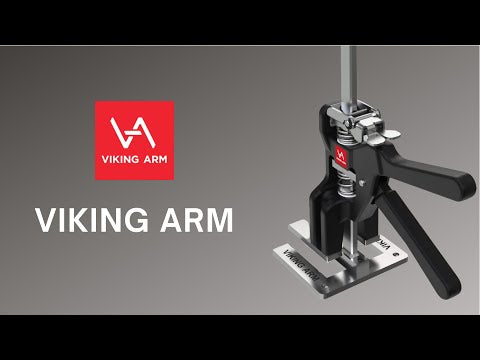
Viking Arm (Optional - But a BIG HELP. Your back will thank us later.)
Step 2. Remove The Old Door & Frame
First, if the old door and frame are still there, you need to take them off. Start doing this by removing the old lock and hinge pins so you can lift the door out of the frame.
If you are concerned about the weight of the door, consider the Viking arm tool to make the process a breeze.
Save yourself some money: Put a putty knife between the wall and the pry bar. This will keep the wall from getting damaged, so you won't have to fix or repaint it.
Next, pry off the old trim and remove the jambs and header. You should be left with a rough opening that looks like a big rectangular hole in the wall.

Step 3. Measure The Rough Opening & Level It
Before buying a new door, you should measure the rough opening to ensure it fits.
You might be surprised to learn that the walls aren't always perfectly straight ("plumb"), that the space between the walls at the top and bottom isn't always the same, and that the floor isn't always level.
Because of this, you need to carefully measure and level everything before moving on to the next step.
Step 3 consists of measuring the rough opening's height and width at both the top and bottom.
It is wise to measure twice just to make sure.
Next, you should check to see if the sides of the rough opening are level.
It is possible that it won't be perfect, but regardless, you need to know how much difference there is to ensure the door you want to install will fit.
Save yourself some time: If you can, you should take measurements before you buy your door. This way, you can save yourself multiple trips and gas!

Step 4. Inspect The Sill (The Bottom)
You need to check the sill to make sure the door fits right.
If the floor isn't level, the door won't open and close easily, so you should definitely check this before moving on.
If the floor isn't level, put wooden shims under the lower end of the leveling tool to raise it until the floor is level.
Find out how high the shims you had to use were (or the height between the level and the floor).
Step 5. Trim The Jamb Based On The Measurements
After inspecting the sill, the measurements you just took will tell you how much higher the floor is on one side of the door than on the other.
Next, you need to trim the door jamb by taking that much off the bottom.
Save yourself from buying another door: You can trim the jamb with a hand saw or a circular saw, but if you're using a circular saw, use a blade with more teeth to keep the wood from splitting as you work.
Before you do anything else, make sure you cut the right jamb. The one that needs to be cut down is the one that will be on the side where the sill is higher.
If you trim the wrong one, you will have to take twice as much off the other side to fix it, so be cautious. Once this is done, the jambs may not likely fit right in your rough opening anymore.
Step 6. Use Shims to Secure The Door Frame
Now shim the door frame. Place one wooden shim on the door hinge and another behind the hinge in the door frame.
After that, apply shims around the frame to fasten the door.
Continue measuring and adjusting until the frame is plumb.
This portion of the job might be time-consuming, but it's crucial to get it properly correct because the door's fit depends on it.
Save yourself some time: If you want to make the process less stressful and speed it up, try using The Viking Arm to push the door up, turning a two-person job into a one-person job!
The Viking Arm is the installer's tool of choice because of its versatility and power.
The Viking Arm was designed to be that second set of hands, ready at a moment's notice.
To see the Viking Arm in action click here
Step 7. Screw Your Frame In
Once the frame is properly positioned, you should be able to screw it in using screws at each place where you put a shim. This part will help to keep everything in place.
You can also put shims between the hinges and the door, using longer screws to screw them in, giving them more strength and rigidity.
Step 8. Install The Door & Test It Out
Set the door on the hinges, and use The Viking Arm to support it if needed.
The Viking arm allows for precision adjustments to make the door install a breeze.
With the ability to handle up to 330lbs, the Viking Arm can handle most door installs.
Finally, put the hinge pins in, and tap them in with a hammer if they don't seem to be going in all the way.
You can now open and close the door to test if it works right.
To test, you want to see a gap of about ⅛ of an inch displayed at the top and strike side, with a gap of 1/16 inch on the hinge side.
If the gaps differ in size, you will need to take the door down and make the necessary changes. Then keep adjusting as needed until it's just right.
Save yourself some frustration: Getting the door hinges to line up sometimes can be tricky. You can loosen the screws a little if this happens, to make more room. This will let you line up the hinges, and you can then tighten the screws again.The Viking Arm definitely helps to support the weight of the door so adjustments can be made.

Step 9. Adjust The Trim, and You're Done!
If the door is in place, opens and closes properly, and everything else goes well, you can now put the trim on and finish up!
Lightly sand the trim and paint it as needed, and if you also need to put the doorknob on, you can do that too, and now you’re all done!
So there you have it, install doors like a pro with these instructions. And to get the job done in even less time, grab a Viking Arm.
You can learn more about the Viking Arm by checking out our Full Tutorial.